
New wallpaper can transform an entire room. Here's a step-by-step guide to wallpapering the right way, ensuring a result you'll be happy with – whether you're using paper or non-woven wallpaper.
Step by step
Preparation
Cover the floor
Start by laying out protective paper on the floor to shield it from wallpaper paste. Remove all switches and outlets.
Find the right corner to start from
Check which corner of the room is least visible. Start or finish wallpapering there. This is especially important if you are using patterned wallpaper.
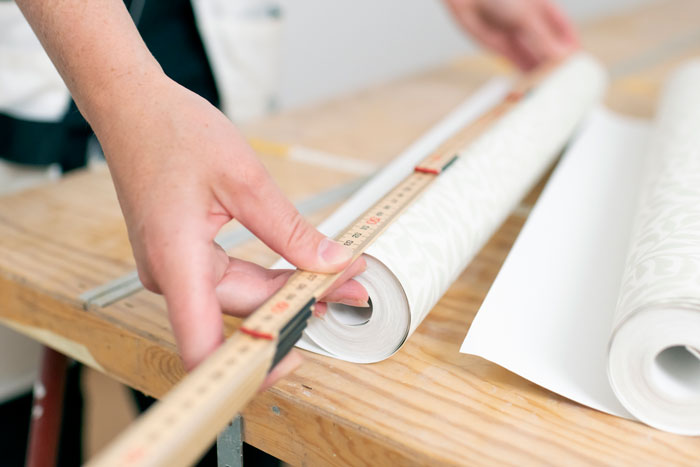
Measure the first drop
The first strip of wallpaper should extend one centimeter beyond the corner. Measure the width of the wallpaper roll with a ruler and subtract 1 cm from the width. Then mark the measurement (wallpaper roll width – 1 cm) on the wall with a pencil.
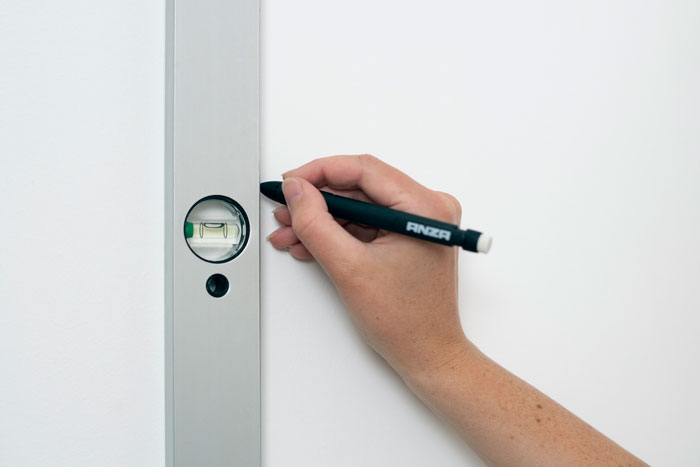
Draw a plumb line on the wall
Walls are rarely perfectly straight. To ensure all drops are straight, the first drop must be plumbed. Do this by drawing a plumb line on the wall with a pencil and a spirit level.
-
Preparation
Cover the floor
Start by laying out protective paper on the floor to shield it from wallpaper paste. Remove all switches and outlets.
Find the right corner to start from
Check which corner of the room is least visible. Start or finish wallpapering there. This is especially important if you are using patterned wallpaper.
Measure the first drop
The first strip of wallpaper should extend one centimeter beyond the corner. Measure the width of the wallpaper roll with a ruler and subtract 1 cm from the width. Then mark the measurement (wallpaper roll width – 1 cm) on the wall with a pencil.
Draw a plumb line on the wall
Walls are rarely perfectly straight. To ensure all drops are straight, the first drop must be plumbed. Do this by drawing a plumb line on the wall with a pencil and a spirit level.
Now it's time to move on to the actual wallpapering.
Wallpapering
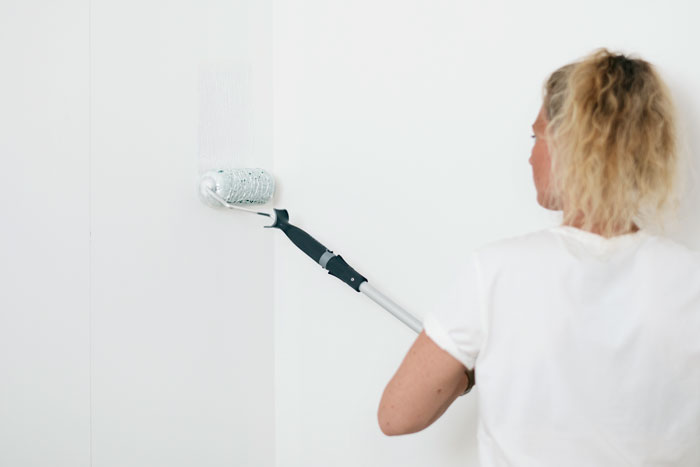
Apply adhesive with a roller
Apply adhesive to the wall. Use a roller suitable for wallpaper paste – this will ensure you apply the right amount of paste to the wall. Make sure the adhesive covers slightly more than the width of the drop. Around moldings and corners, it's easier to use a brush for more precision.
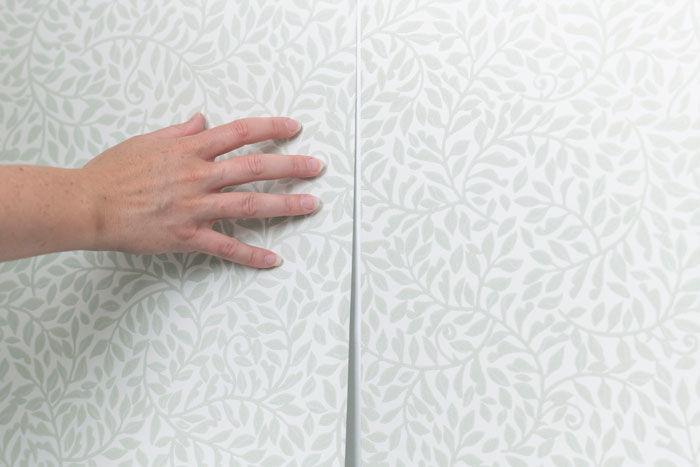
Attach the first drop
Loosely attach the first strip of wallpaper to the wall along the plumb line. Remember that the wallpaper must extend 1 cm beyond the corner.

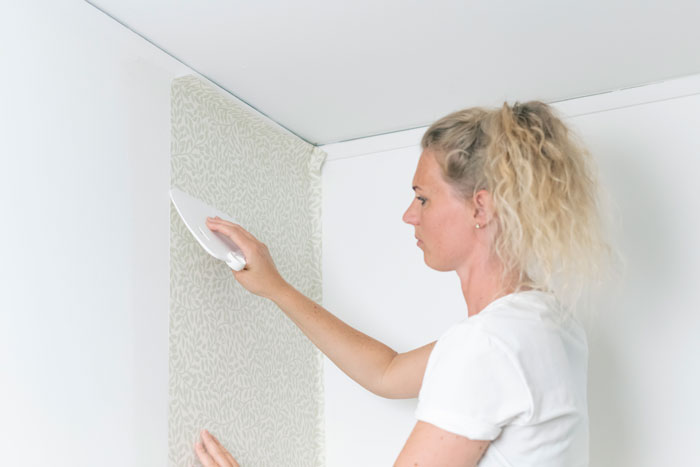
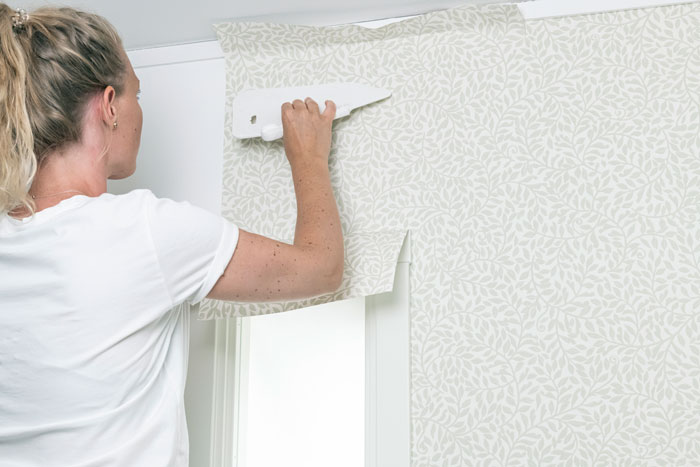
Attach the first drop with a wallpaper tool
Smooth the wallpaper with a wallpaper tool. Start from the center and smooth outwards towards the edges. Make sure the wallpaper is firmly attached and free of bubbles. Remember to press the wallpaper firmly into the corner.
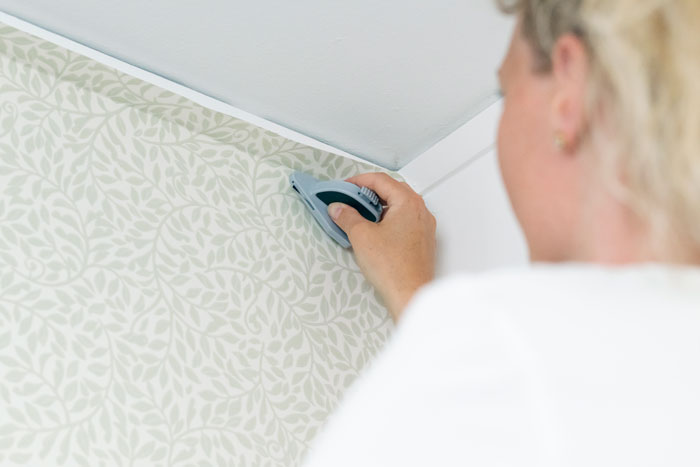
Trim the drop with a wallpaper knife.
Trim the wallpaper along the baseboards and ceiling. Use a wallpaper knife. Make sure the blades are very sharp – otherwise the wallpaper can tear.
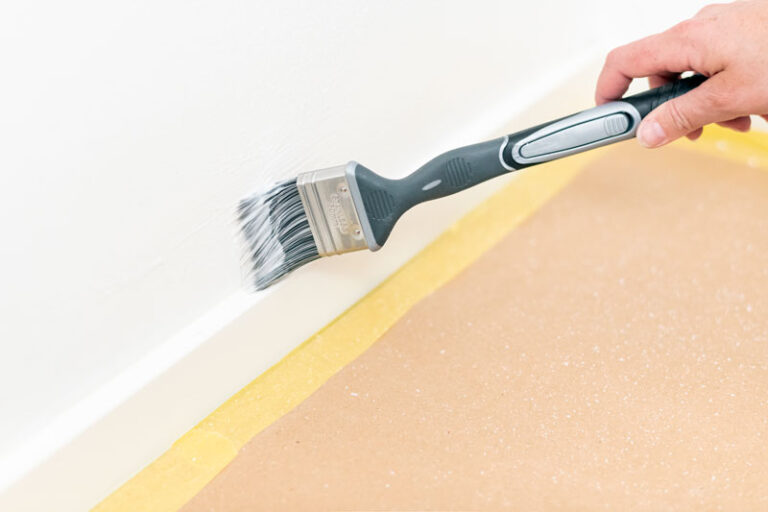
Wipe away adhesive
Wipe away adhesive residue from the wallpaper and moldings with a damp sponge after each application. Make sure to use plenty of water – otherwise the walls can become spotty.
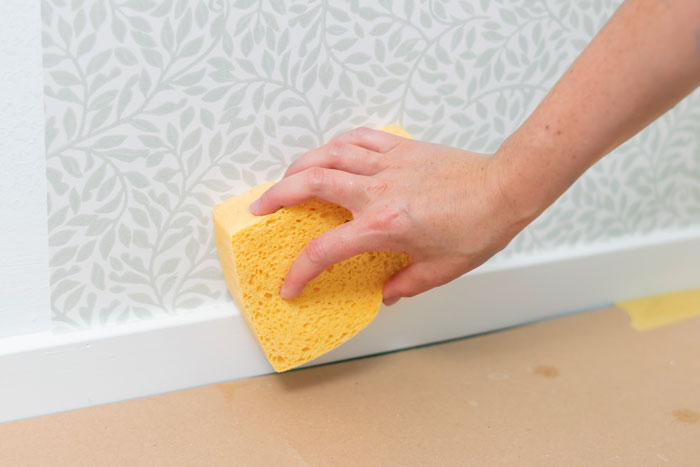
Do the same after each drop.
The next step is matching patterns and wallpapering around corners, doors, and windows.
-
Preparation
Cover the floor
Start by laying out protective paper on the floor to shield it from wallpaper paste. Remove all switches and outlets.
Find the right corner to start from
Check which corner of the room is least visible. Start or finish wallpapering there. This is especially important if you are using patterned wallpaper.
Measure the first drop
The first strip of wallpaper should extend one centimeter beyond the corner. Measure the width of the wallpaper roll with a ruler and subtract 1 cm from the width. Then mark the measurement (wallpaper roll width – 1 cm) on the wall with a pencil.
Draw a plumb line on the wall
Walls are rarely perfectly straight. To ensure all drops are straight, the first drop must be plumbed. Do this by drawing a plumb line on the wall with a pencil and a spirit level.
Now it's time to move on to the actual wallpapering.
Wallpapering
Apply adhesive with a roller
Apply adhesive to the wall. Use a roller suitable for wallpaper paste – this will ensure you apply the right amount of paste to the wall. Make sure the adhesive covers slightly more than the width of the drop. Around moldings and corners, it's easier to use a brush for more precision.
Attach the first drop
Loosely attach the first strip of wallpaper to the wall along the plumb line. Remember that the wallpaper must extend 1 cm beyond the corner.
Attach the first drop with a wallpaper tool
Smooth the wallpaper with a wallpaper tool. Start from the center and smooth outwards towards the edges. Make sure the wallpaper is firmly attached and free of bubbles. Remember to press the wallpaper firmly into the corner.
Trim the drop with a wallpaper knife.
Trim the wallpaper along the baseboards and ceiling. Use a wallpaper knife. Make sure the blades are very sharp – otherwise the wallpaper can tear.
Wipe away adhesive
Wipe away adhesive residue from the wallpaper and moldings with a damp sponge after each application. Make sure to use plenty of water – otherwise the walls can become spotty.
Do the same after each drop.
The next step is matching patterns and wallpapering around corners, doors, and windows.
Pattern matching
Are you using patterned wallpaper? Then it's important to pay special attention to pattern matching. Patterned wallpapers require a different working method than plain wallpapers. Read more about how to do this in our guide: Patterned wallpaper – step by step.
Wallpapering corners
Wallpapering corners requires a special technique. The wallpaper must overlap the corner by 1 cm to keep it stable and prevent cracking. Therefore, you need to cut the corner piece into two parts.
Wallpapering around windows and doors
For windows and doors, you need to glue slightly beyond the window or door frame. Then pull up the wallpaper and adjust the pattern if necessary.
Attach and cut the wallpaper
Apply the wallpaper with a wallpaper tool and cut it along the folds. Read more about how to do this in our guide:
Wallpapering around windows – how to do it, step by step.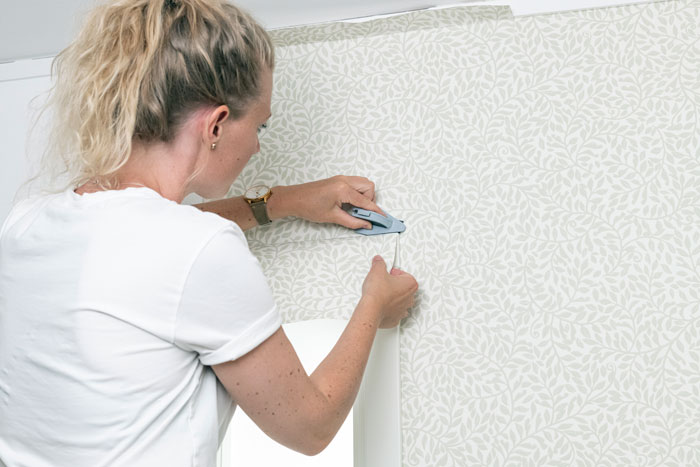
-


